Wondershare DemoAir
DemoAir is an easy-to-use screen recorder to capture your screen and webcam to create a video message for better communication.
With a drastic shift to online classes and presentations, teachers are often trying to find ways to make their lectures more interactive and engaging. While it is quite a trend to teach online and it is challenging to keep the whole class aligned on the same page. The teachers have been putting in their efforts and creating more slide presentations to keep the lectures catchy and attractive.
Google Slides now does not have an embedded tool for recording voice-overs, and the desired feature can only be achieved via external software. So, in this article, we have concluded the two free and user-friendly software that can help you embed voice in your Google slide presentation. So, without further ado, let’s begin.
How to Do a Voiceover in Google Slides
Google Slides has no direct way of adding audio to the slides; however, Add-Ons like Pear Deck can help in doing it. The software is available as a chrome extension and can be added to record and add voiceovers to slides directly.
Pear Deck- Audio Recorder for Google Slides
Pear Deck is a free software that allows recording and editing voiceovers for presentations. With various in-built editing tools and a template library, you can add interactive questions and pictures to slides and make them more appealing for the students.
Follow these steps to use Pear Deck for recording audio for your slides:
1. Open the Google Slides presentation you want to video record.
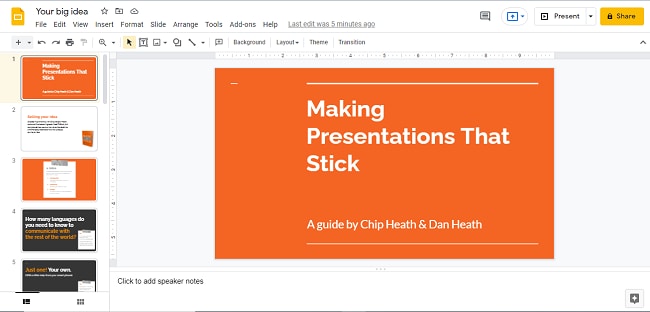
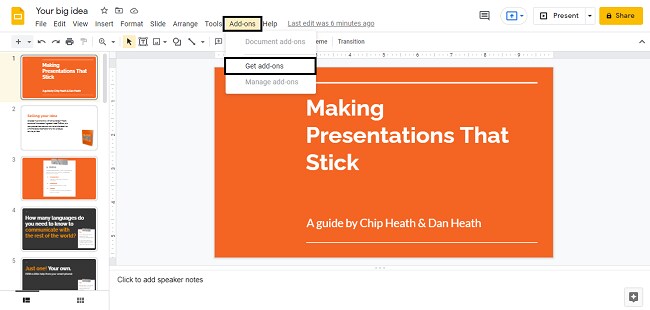
2. Next, install the Pear Deck Audio Recorder by clicking on Add-On, followed by Get Add-Ons.
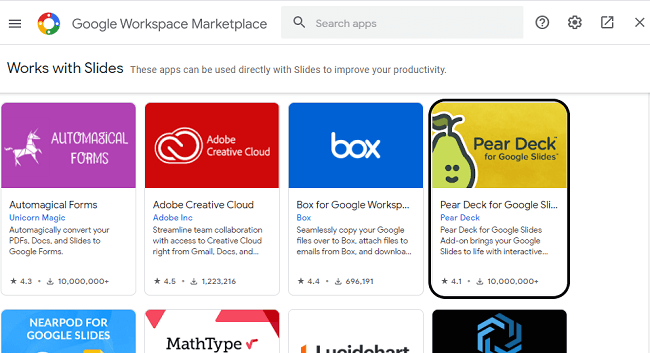
3. Search for Pear Deck and install it.
4. Now, use the installed application to record a voiceover for your presentation. Tap Add-Ons > Pear Deck for Google Slides Add-On > Open Pear Deck Add On.

5. Pear Deck will be activated on the right sidebar of Google Slides. Scroll the sidebar to find and click ‘Add Audio to Slide’ to start recording.
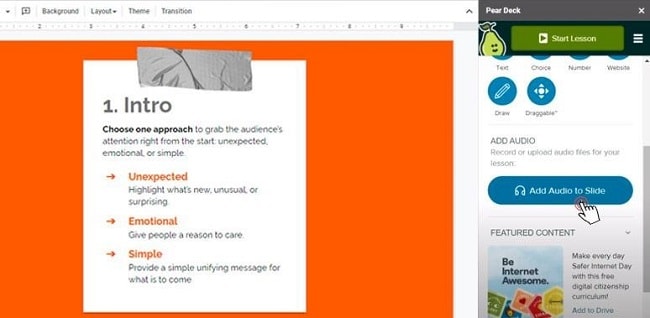
6. After you have recorded the voiceover, click ‘Add Audio to Slide.’ The audio will be inserted into the slide and appear at the top right corner of it.
Tip: Be sure to record your voice at a quiet place with minimum background noise. Speak clearly and practice before you start the final recording. To avoid echo, wire a headset to record audio and for clear voice output, make sure to test audio at different places and mic distances.
Record Screen and Voiceover with DemoAir
To enhance the interaction with students and viewers, screen recording Google Slides along with an audio narration is the best way possible. While the narration aids in explaining something more efficiently, it also helps in improving the viewer engagement.
For this, all you need is a good, user-friendly, and free screen and audio recorder like Wondershare DemoAir. The software is available as a chrome extension and is 100% free and user-friendly. Whether you are a novice or tech-savvy, the software is incredibly easy to understand and use. With built-in editing tools, it gets easier to record and edit the videos.
1. Install Wondershare DemoAir from the chrome extension. Create a new account or sign into an already existing account.
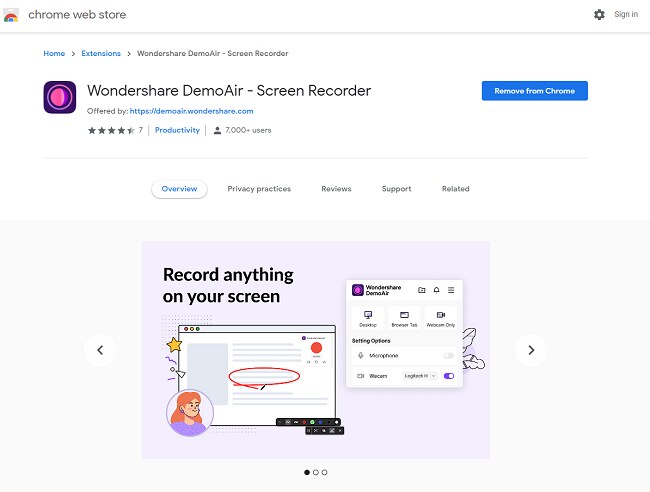
2. Open the Google Slides presentation that you want to screen record. Turn off pop-up notifications for all apps and software that can possibly interfere with your recording.
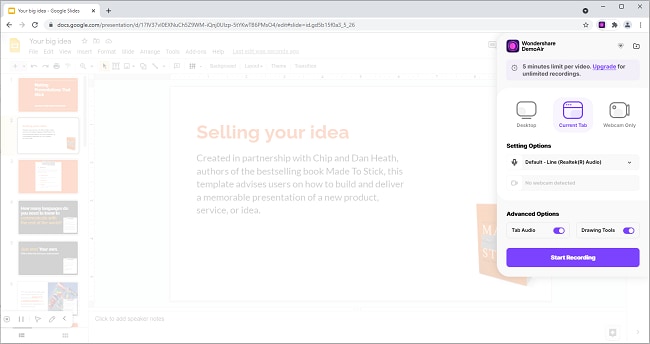
3. Tap on the DemoAir chrome extension to open settings and start recording. To record the Google presentation, select the Current Tab option from the settings.
4. Next, adjust the settings according to your needs.
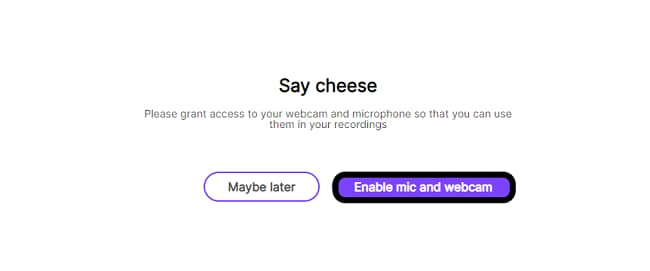
● To record the voiceover with a microphone, set up access to your computer’s microphone and choose a suitable audio device.
● To screen record the browser tab and a webcam stream simultaneously, set up access to your Webcam and choose a suitable webcam device.
● To record the browser tab's audio, enable the ‘Tab Audio’ from settings.
● For writing and drawing on the recording screen, enable the Drawing Tools. (Wondershare DemoAir chrome extension has drawing Tools enabled by default.)
5. Once the settings have been adjusted, click Start Recording to start screen recording. Make sure the presentation is open when you hit the record button.
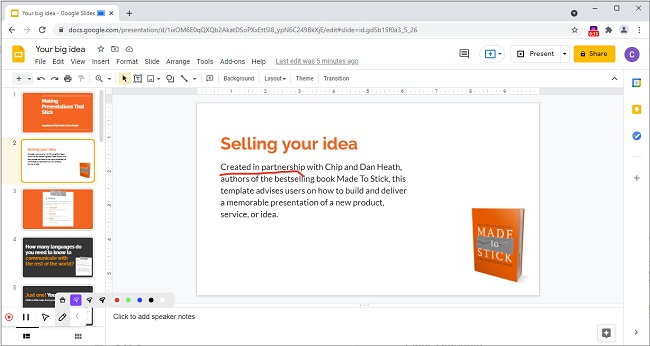
When the tab is recording, a blue recording box icon will be visible on the right of the Tab title.
6. Click the || button from the DemoAir browser extension to pause/resume the recording.
7. When you are finished recording, click on the DemoAir extension icon and click the stop button.
After the recording has been stopped, the video will open in a ‘Video Detail Dashboard’. Here, you can review the video and trim it, to make it more specific.
Once done with editing and reviewing, you can share, save or download your video. Connect your Google Drive with DemoAir to automatically save the videos on your drive. For seamless communication with students and your team, you can also use the DemoAir shareable link. The link can be shared and clicked to watch the video anywhere, anytime.
Besides these two options, the screen recordings can also be directly published on YouTube (only if you have a YouTube channel). The videos can directly be shared to YouTube from the Video Detail Dashboard.
Wondershare DemoAir
DemoAir is an online screen recorder to record your desktop, browser tab or webcam only and share video directly to different platforms.
Final Thoughts
It's a wrap! We have concluded two ways of embedding voice in Google Slides, and now it's on you to choose what works best for you. While the pear deck is a direct way of adding audio to slides, the Wondershare DemoAir is an excellent way of recording presentations with audio.
If you have students with a shorter attention time or you have a dry subject to teach, we recommend using the DemoAir to screen record your presentation along with a voiceover. With the in-video drawing options, the presentation will turn out to be even more attractive and engaging. Apart from this, the multiple sharing options will allow seamless contact with the students.
