When it comes to agile project development and management, Jira is one of the most widely used technologies out there. While Jira offers a wide range of inbuilt features, a lot of users find it hard to share videos (of reviews or discussions). To overcome these limitations, you can simply integrate a smart screen recording tool like DemoAir with Jira. Without much ado, let’s learn how you can make the most of Jira with the help of Wondershare DemoAir.
Part1 Things to Know about Jira
Developed by Atlassian Technology, Jira is a powerful project management tool for agile teams that was initially released in 2002. The cross-platform proprietary web-based application is widely used for bug tracking, project management, internal communication, and so much more.
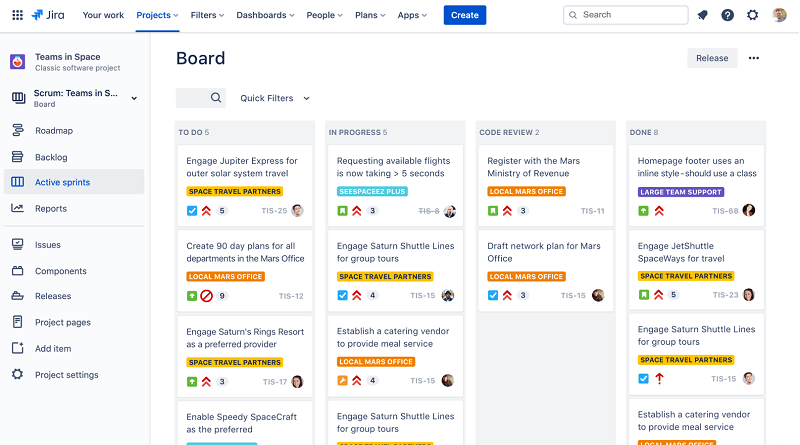
On Jira, you can work on different Scrum Boards that would let you manage deadlines, set milestones, and collaborate with your team. Besides that, you can also work on Kanban boards and roadmaps, based on your requirements. Agile reporting, bug tracking, and end-to-end DevOps visibility are some of the major applications of Jira.
Part2 How Video Communication can be Beneficial in Jira?
While Jira has several inbuilt features for bug tracking or team communication, the integration of videos can be beneficial in the following ways:
Better Communication
By creating videos or taking screenshots of a product, you can easily report any issue to others and give your feedback in a more effective way.
Reviewing Codes
If you want to improve the overall efficiency of your team, then you can create a video of the entire bug tracking or code reviewing process. In this way, you can emphasize any part of the code and give suggestions at the same time.
Product Reviews
Apart from bug tracking, a screen recording tool can also help you create a detailed review of your product, covering the overall functionality of its major features.
Other Benefits
By creating timely videos, you can easily educate your team about any progress that is made on the project and keep everyone on the same page without any complications. It will also add a better visual appeal to your project, making it easier for everyone to understand the allocated tasks, feedbacks, or any other form of communication.
Part3 How to Record Videos on DemoAir and Share them on Jira?
By integrating a resourceful tool like DemoAir, you can certainly make the most of Jira and communicate with your team in a better way. Developed by Wondershare, DemoAir is a freely available Chrome extension that offers various video recording options. If you want, you can also integrate third-party platforms like Jira, Slack, Trello, and so on with DemoAir for seamless project management solutions.
Here’s how you can get started with Wondershare DemoAir and share your videos on Jira like a pro.
Step 1: Install DemoAir on Google Chrome
If you aren’t using DemoAir already, then you can install it for free by visiting its official website. Just click on the “Add to Chrome” button to install the DemoAir extension on your browser.
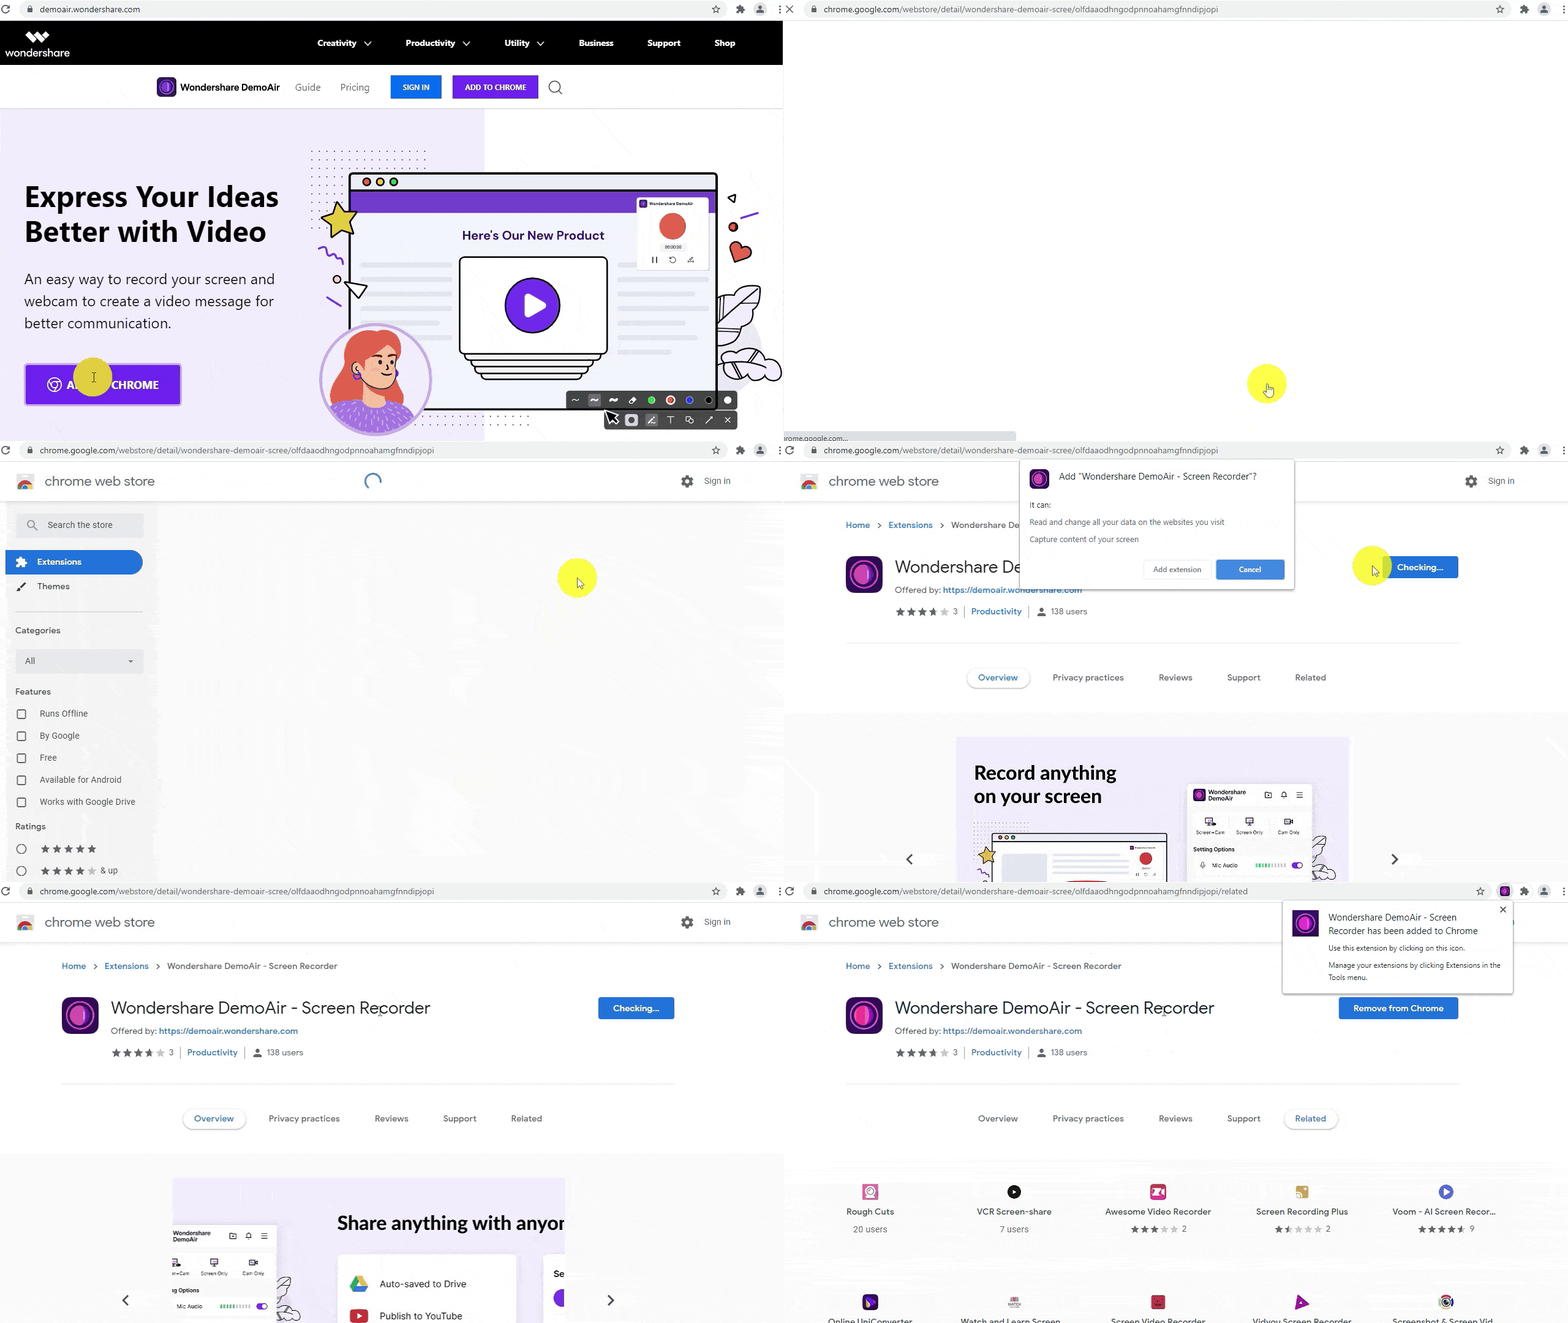
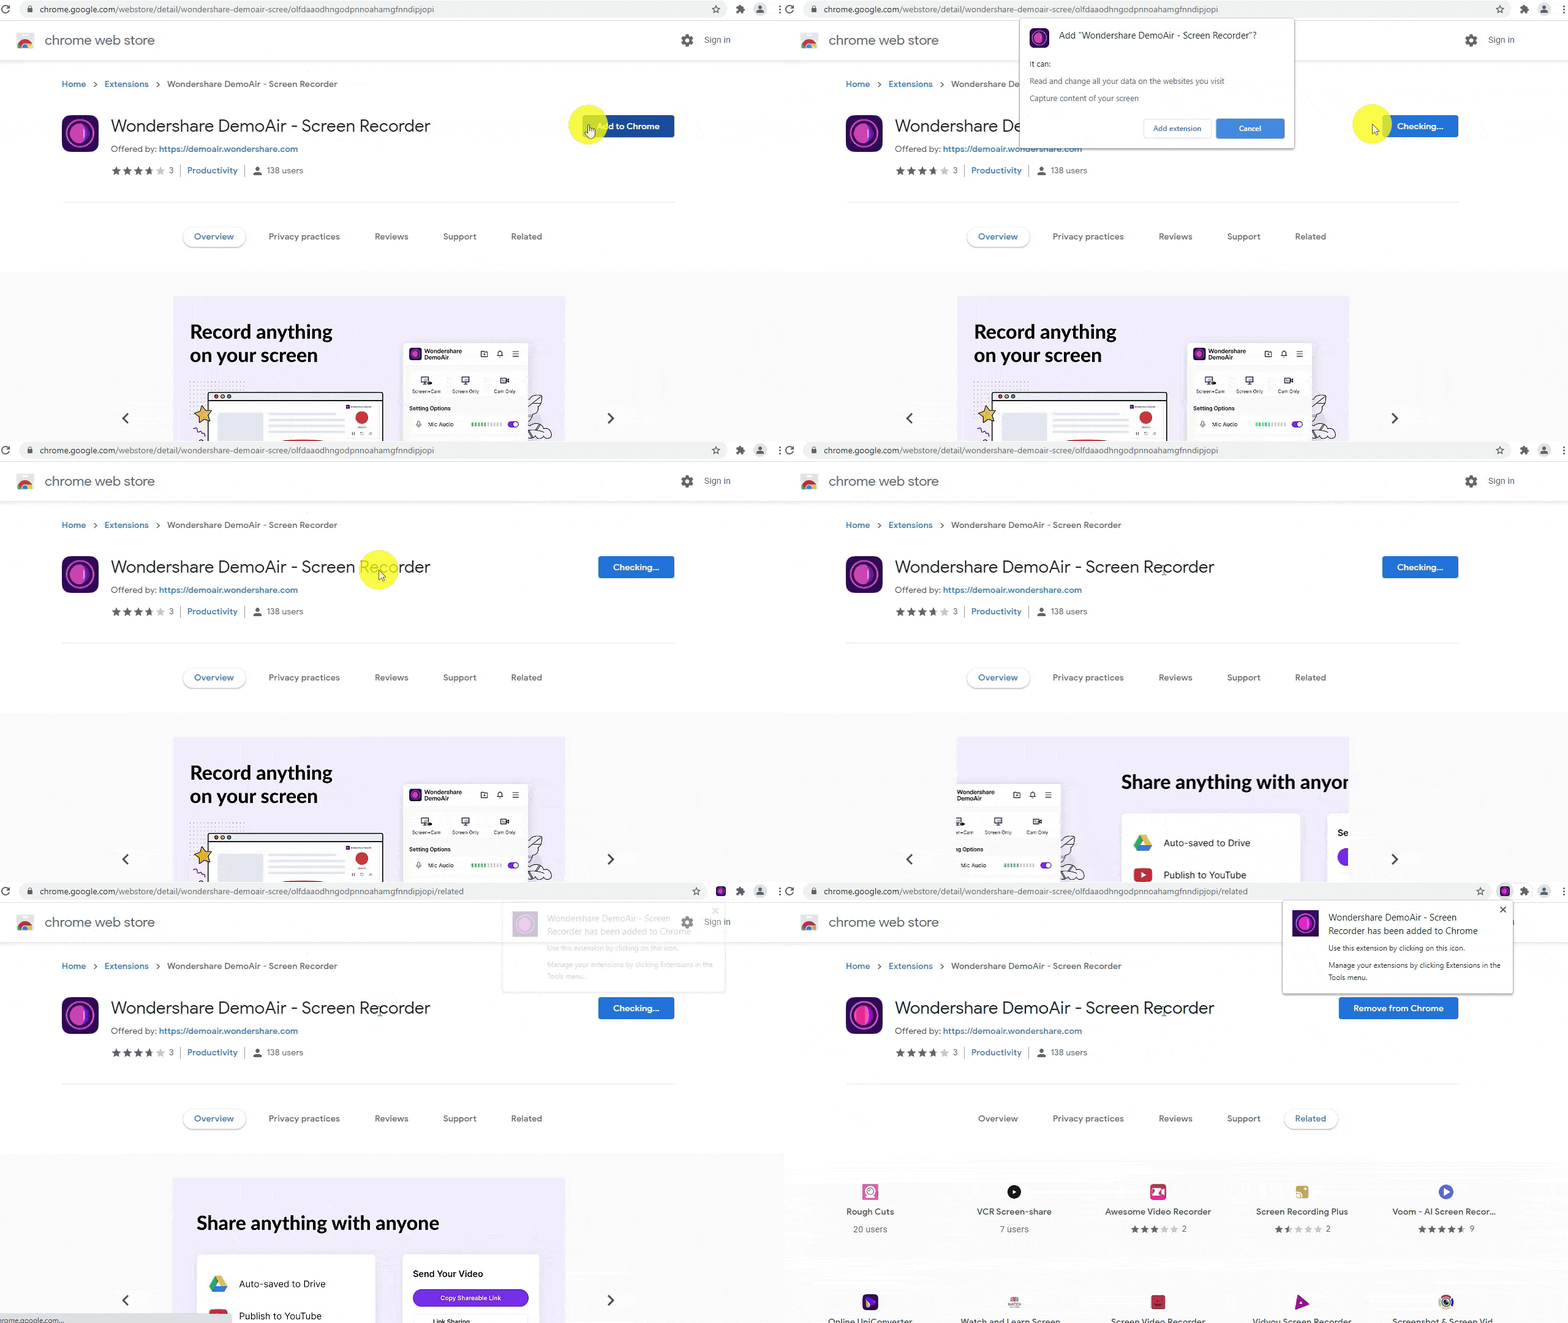
Apart from that, you can also go to the official Google Chrome Web Store, look for DemoAir, and choose to add it to your browser from here.
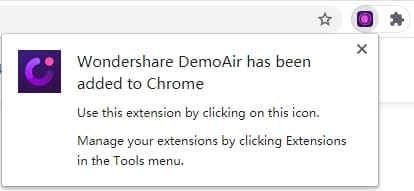
After successfully installing DemoAir, you can check its dedicated icon on the extension bar of Google Chrome.
Step 2: Start Recording your Videos with DemoAir
To get things started, you can just click on the DemoAir icon on Google Chrome and pick either of the recording modes – Desktop, Browser Tab, or Webcam Only. You can also choose to link your system’s microphone, default audio, or webcam for a seamless recording experience from here.
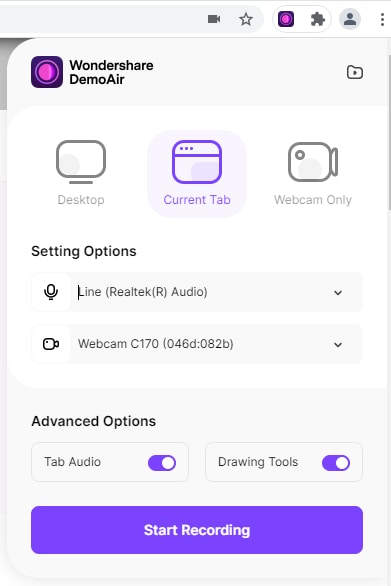
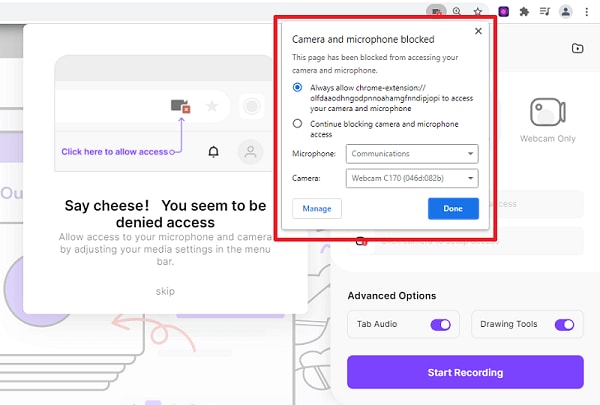
You can further choose to tab the audio input or include a drawing toolbar during your video recording. Let’s suppose that you wish to record the browser activity on your system. In this case, you first need to grant DemoAir all the vital permissions to access your system’s microphone or webcam input.
After meeting these prerequisites, you can just click on the “Start Recording” button and go to the browser tab that you wish to record. In the same way, you can also record the desktop activity on your system as well.
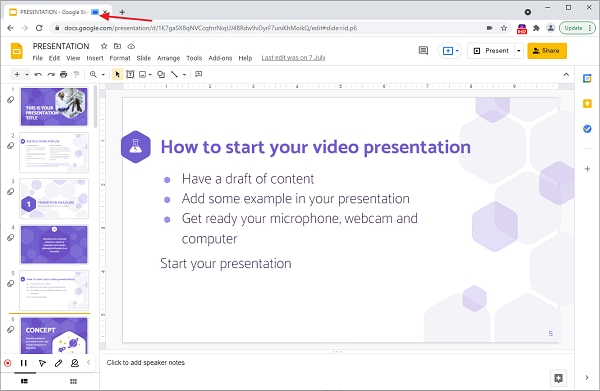
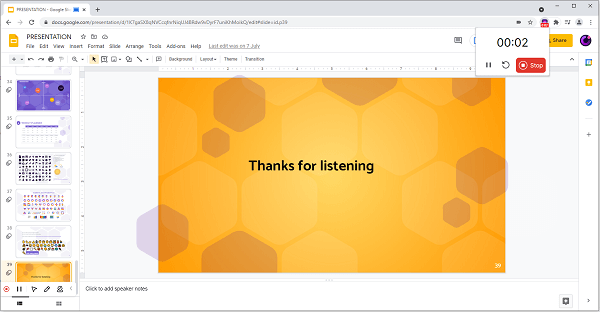
If you want, you can also use the inbuilt drawing toolbar of DemoAir to focus on any area (for reviewing codes) or highlight mouse clicks. Once you are done recording, you can again go to the DemoAir extension, and choose to stop/pause the video recording.
Step 3: Share your Video Recordings on Jira
Great! Once you have recorded your video, you can find it in your DemoAir dashboard on Chrome. To share it, you can just select the video recording and click on the “Jira” icon from the list of the collaborative tools on the right. Subsequently, click on the “Connect with Jira” button to integrate your Jira account with DemoAir.
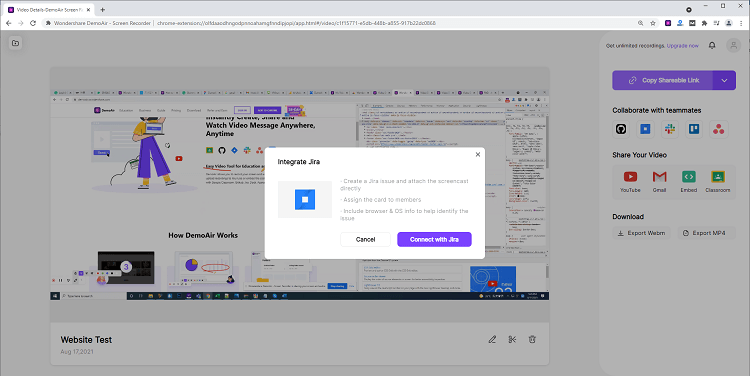
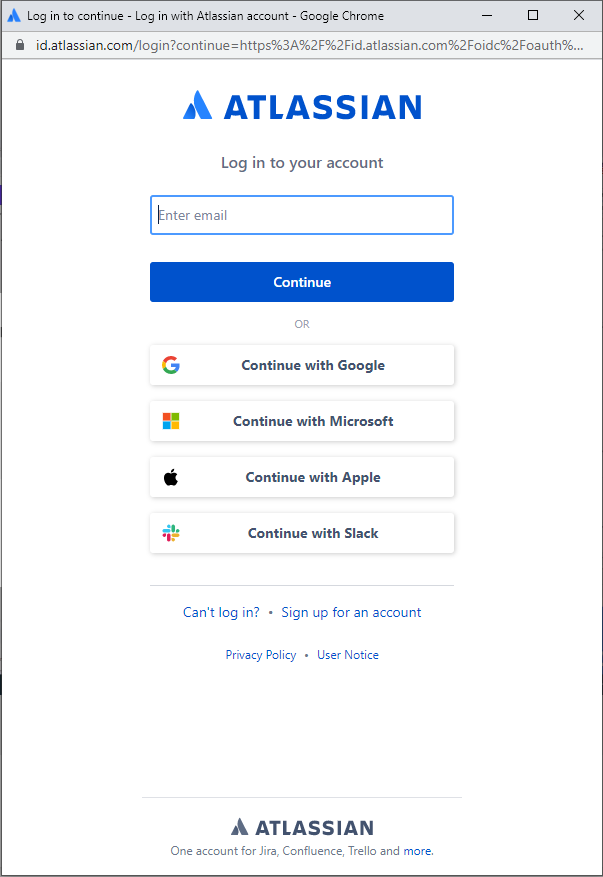
Furthermore, you just have to log in to your Atlassian (Jira) account by entering the right account credentials. In case you are new to Jira, then you can also choose to create a new account from here.
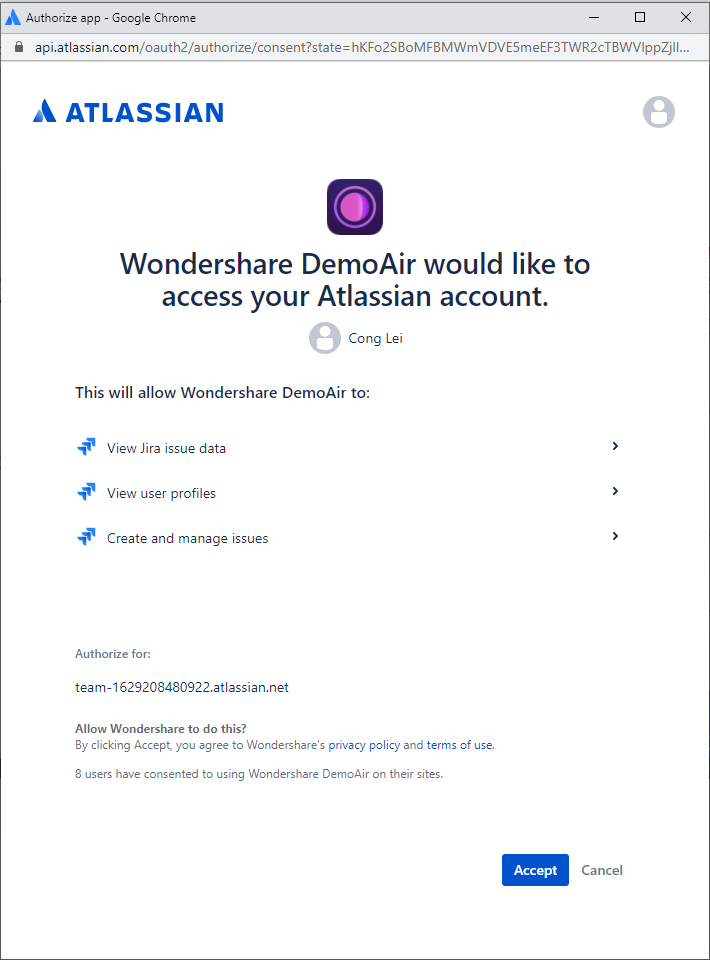
To proceed, you need to grant Wondershare DemoAir all the vital permissions to view and manage your Jira account.
That’s it! Once DemoAir has been successfully linked with your Jira account, you can directly post your videos to a relevant group on Jira and manage your recordings in one place.
Part 4: Conclusion
As you can see, Jira is one of the most progressive tools for bug tracking, project management, and team collaboration. Though, if you want to communicate with your team in a better way, then using a tool like Wondershare DemoAir would be an ideal solution. The smart web-based solution would let you create product demos, reviews, and so much more on the go. If you want, you can even integrate your Jira account with it to directly share your video recordings from the native interface of DemoAir.
